Monday, December 27, 2010

Avon Mirror Shine - Glisten Swatches and Review

My awesome grandma knows how much I love nail polish and got me this beauty along with another Avon polish (Electric Purple - I'll probably swatch it later). This is part of their Mirror Shine line, which seems a lot like the China Glaze Khrome collection. This is Glisten, a beautiful sky-blue (slightly teal) that has a bright chrome finish. It really only needs one coat, but I did two here to try and make it perfectly smooth.

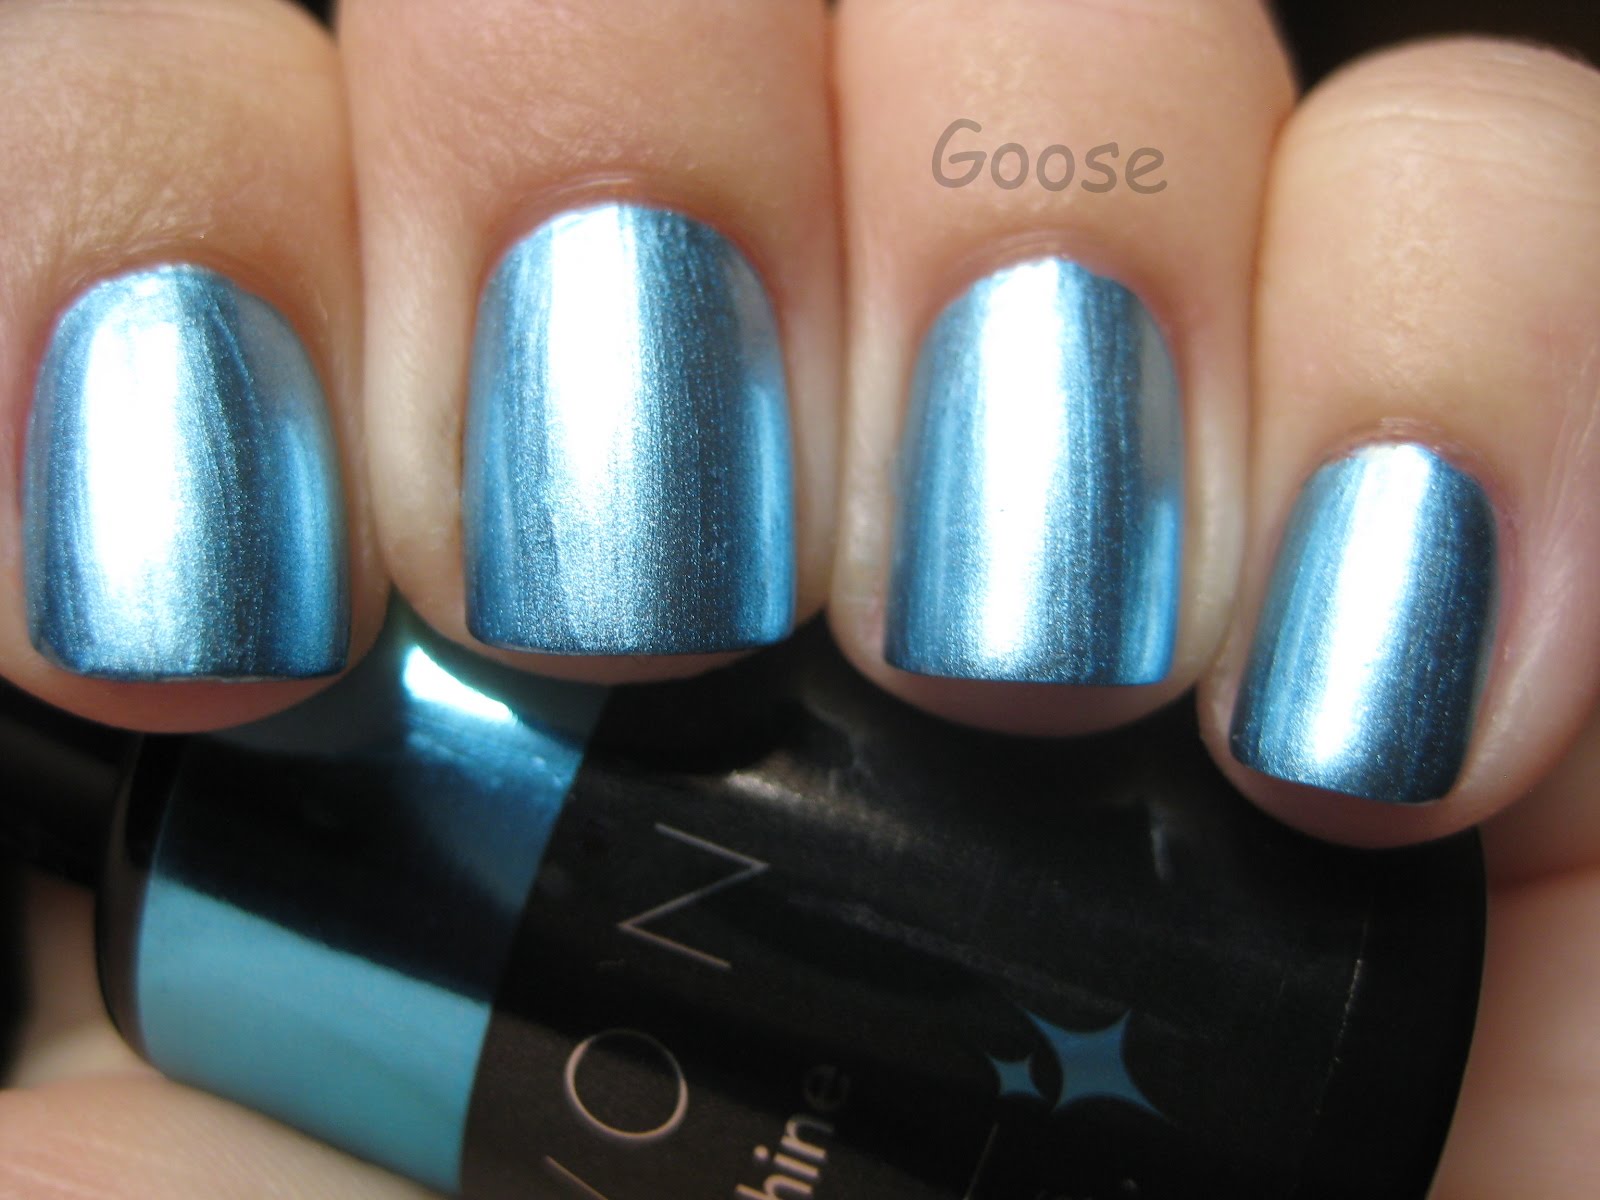
Avon Mirror Shine Glisten

The only issue with this one (and probably every other chrome) is that it shows any little speck of dust or dirt or fuzz. As long as you use a ridge filling basecoat and make sure your nails are nice and clean, it shouldn't be a problem. Also, brushstrokes are very minimal (yay!).

My sister got the purple one which is also awesome, and hopefully I can borrow it from her someday to swatch it as well.

I love this one so much - it looks SO cool on! Thank you, Ama!!

Tuesday, December 21, 2010

OPI The Berry Best Swatch and Review

This beauty surprised me. In the bottle, it looks like a red with some pink flash and gold shimmer, but on the nail it's a glowing magenta/fuchsia with a very slight duochrome of copper/gold. It looks somewhat metallic, and very bright and cheery for the winter/holiday season!

OPI The Berry Best


Do you have any of the Ulta exclusive OPIs? What do you think if this one?

Friday, December 17, 2010

New Nail Shape + Old Favorite

After seeing a post by the Polish Hoarder in which she rounded her nails down because of a chip, I decided I liked how her nice short, ROUND nails looked! Of course, I had to try it for myself, but this is WAY out of character for me... I've always had very square-edged nails and never really appreciated rounded tips. Funnily enough, it IS very flattering.

So here are my new rounded nails with an old favorite of mine: OPI You Don't Know Jacques. This is such a wonderful fall/winter color, and it was the perfect glossy creme to test out my new nails!


Because the rounded shape isn't very apparent in this picture, here's one that shows it a little better.


How do you shape your nails? Do you stick to one shape or change it up often?

Black Comparison and a New Way of Mattify-ing

I love black nail polish... I don't know what it is, but it looks so classy in an edgy sort of way, and I just love it. So here are two of my black polishes swatched normally with not top coat, just glossy all on their own. On my index and middle is Orly Liquid Vinyl, and on my ring and pinky is China Glaze Liquid Leather.


The Orly is more pitch black than the ChG, which is much more of a charcoal jelly that builds to a black in two coats. Honestly, I CAN tell the difference in person, but I doubt anyone else would notice. The ChG looks deeper, like you're looking into a black pool, while the Orly is darker and looks more like a shiny black surface like patent leather or vinyl.

Now here is my new way of mattify-ing polishes. Honestly, I never got into the matte trend much, but I like it sometimes. Usually I'll take an existing color and use ChG Matte Magic over it, but I hate how it always seems to lighten the color or make it cloudy looking. I got this new buffing block that feels like the buffing surface is just the foam, and not a separate piece of "sandpaper" like on some. I just lightly buffed the topcoat (in this case, Seche Vite) once it had dried in long sweeping motions. Here is the result:


I REALLY like how it comes out. Yeah, it doesn't come out too matte - more like a satin finish, but I think I prefer that anyway - and it shows a bit of buffing stroke lines, but the best part is the lack of cloudiness! I've been considering getting Illamasqua Scorn because of how gorgeously dark it is for being a matte (or satin) black, but I may have found a new way to satisfy the craving.

Here is a picture of the buffing block I used:


What do you think of this way of mattify-ing a polish? Have you ever tried it before? Do you have a favorite matte topcoat?

Wednesday, December 15, 2010

Orly Wild Wisteria Swatch

I put Orly Wild Wisteria on so I could try my new Sally Hansen Turquoise Opal over it(most awesome duochrome EVER, by the way... pics soon!), but once I put it on that one finger, I just had to put it on the rest. This, to me, seems like a winter color, though it was released in their spring collection. It's also a dupe for OPI's Sapphire in the Snow.

Orly Wild Wisteria


Isn't it BEAUTIFUL?? I love this dark blue/purple super-shiny creme. It only took two coats (barely even needs the second coat) and applied very smoothly and evenly. I suppose it can sometimes have that "almost-black" look to it, but only in really low lighting.

I'm thinking of stamping some snowflakes on this one to make it a little more festive... what do you think?

Tuesday, December 14, 2010

Some Holiday Manicures for the Festive Fingers Contest

After reading about Nicole by OPI's festive Fingers contest, I REALLY wanted to find the perfect holiday mani to submit. Here are a couple that I really like:


This is China Glaze Mommy Kissing Santa with Orly Hair Band as a glitter gradient on the tips.


This was the beginning of the following manicure - gold French tips done with OPI Glitzerland. Then I stamped the holly leaves in Jolly Holly using a Bundle Monster plate and dotted the berries first in OPI Royal Rajah Ruby then in China Glaze Red Pearl.


Which one is your favorite and which one should I submit to the festive fingers contest? Help me decide!

Monday, December 6, 2010

Milani Jewel FX Swatches and Review

After I saw this collection reviewed online, I knew I just had to have these crazy polishes! These are from the new Milani collection that includes One Coat Glitters and Jewel FX, and every single one is stunning!


Milani Silver Dazzle

The first is Silver Dazzle, and I think it's my favorite of the glitters. It is a cool-toned charcoal grey glitter that really sparkles with a topcoat. It actually looks pretty cool without a topcoat as well - it has a gritty, matte look which looks very wintry to me. It would also probably look neat with a topcoat and a matte topcoat (to get rid of the rough glitter finish). This is two coats shown.


Milani Gold Glitz

The other glitter I picked up was Gold Glitz. This is ONE COAT! I love warm-toned golds, as they tend to look better on my skin, and this one is perfect. It's a very beautiful holiday color! I didn't pick up the red, purple, or blue glitters because I have some similar, and I'm trying not to buy nail polishes that I have near dupes of (but the One Coat Glitter formula is pretty awesome, so it might be worth it!). If you'd like to see swatches of those, check them out here!


Milani Gems Jewel FX

There are two Jewel FX polishes in the collection, and the first one is called Gems. It is a whole bunch of multi-colored glitter in all different sizes. While the One Coat Glitters contain a whole bunch of microglitter, this has only larger pieces, and it makes it a little easier to clean up (though still hard to remove). It is rumored to be a dupe of Lippmann's Happy Birthday, but it's actually missing the pink/purple glitter (you can see a swatch of it here). Other than that, it's VERY similar with the different shapes, sizes and colors of glitter. This one reminds me of a nutcracker for some reason, and feels like a holiday color, though you could wear it year-round. This is three coats, though the last coat was more of a "touch-up" to cover any bare spots. The glitter in this has to be controlled a little to "place" it in the right spot, but it's not too hard to do.


Milani Gold Jewel FX

This is Gold Jewel FX, and I think this is as "mirror-like" as you can get without having Minx. It is truly spectacular in person. It's cool-toned gold, but luckily it still looks nice on me, and I will SURELY be wearing this one (I don't even care how painful the removal will be). This was two coats, and again it's best to push around the glitter to place it where you want it, especially on the second coat. It was SO easy to clean up (I took it off before it dried) because the big glitter pieces don't get EVERYWHERE like the microglitter does. Here's another pic to try and show off this "mirror" finish.


These could all be a horror to remove, but if you remember the foil method for glitter removal, then they shouldn't be too bad. Just soak a cotton ball in pure acetone or acetone polish remover (I usually split the cotton balls in half so I don't use as many), place it on the glitter polish and wrap it in aluminum foil (so that it doesn't evaporate). Wait for about 5-10min before pressing down and sliding it off. Be sure to moisturize your fingers after soaking them in the acetone!

I can't decide what to put on my fingers and toes now! I kind of want to do Gems on my toes because it'd go with anything I could think of to put on my fingers :o)

Do you like these new glitters? Are you willing to put up with crazy glitter removal for these beauties?

Sunday, December 5, 2010

Black Lace French Mani


I decided I really like some of the Konad designs I've seen, but I'm not very good at it, so I should practice. Again, inspired by Chloe, I tried to make a similar mani to her Lace Funky French Mani. I loved the Konad design she used, but I don't have that plate, so I had to use a different one. This one is really fun to wear, and I'm definitely going to try more Konad and Scotch tape mani's soon!


Saturday, December 4, 2010

Black French Mani

Today's manicure is inspired by Chloe from Chloe's Nails. She does some amazing designs using scotch tape, including awesome French mani's. It looked simple enough, but I'd never had much luck with tape before. She provides some great tips on how to use tape to create lines and shapes in a manicure. This one came out ok, but I'm sure it just takes some practice!


I used 10 in Pinky Promise (415) (can be found at CVS) with Wet'n'Wild Black Creme (most opaque black creme EVER!). Isn't it awesome?! I'm dying to try her patchwork mani next! I want to try a holiday one, but don't know which colors to use... I'm thinking green and chrome gold and something else... maybe gold glitter?
Do you like French manicures that utilize different colors? Have you ever used Scotch tape for nicely defined lines?

Friday, December 3, 2010

Another Holiday Manicure

Here's a quick post of a holiday mani I did last week. I saw a similar manicure by All Lacquered Up using Orly's new holiday collection here and loved it, so I figured I'd recreate it as best I could. I used China Glaze Phat Santa and CND Sugar Sparkle to get this look.

China Glaze Phat Santa w/ CND Sugar Sparkle

I love the effect Sugar Sparkle gives - I think it makes it look like a sugary Chrismas candy! I'm thinking of making a "gumdrop" mani with CG Mrs. Claus, Mistletoe Kisses, and Grape Juice. Are there any other colors you think I should add into the mix?? This over each one might give them an even more sugar-coated appearance.

Any holiday mani ideas that you'd like to see?

Tuesday, November 30, 2010

Emerald Sparkle and Christmas Tree Mani

First up is the beloved Emerald Sparkle from China Glaze. I know this is a favorite among nail polish bloggers, and I understand why. It is just STUNNING. Pictures just don't do this one justice. It is such a rich beautiful green glitter, and it makes the perfect holiday manicure. This could definitely have used a topcoat, but I wanted to try all sorts of stuff on top of it so I didn't use one for this pic.

China Glaze - Emerald Sparkle


Now I have a whole LIST of holiday manicures to try before Christmas, and today I was looking for a perfect "Christmas tree" manicure. I wanted it to look like a green Christmas tree with lights/ornaments on it. Here are the combinations I tried out. I originally had CG Nova on the ring finger, but it covered up the green WAY too much (that one is OPAQUE, let me tell you! Two coats would make a completely opaque mani, I'm sure!) so I redid the ring finger in just Emerald Sparkle so I could compare it with FingerPaints Evergreen Dream.


My favorite ended up being the Hot Topic stars (doesn't have a real name) minus the actual stars (haha) because it has just a smidge of iridescent glitter that doesn't "take over" like the Color Club Si Vous Please did. It's hard to see in the photo, but it adds just a bit of multi-color to the green. I thought the CC and Fairy Dust were just too much.

Notice that I did my thumb in FP Evergreen Dream. This is such a wonderful alternative to Emerald Sparkle when you don't want to have to deal with the painful glitter removal. It's actually a green shimmer, but looks SUPER sparkley in the daylight and sun. It's not quite as deep or rich as ES, but it's still freaking gorgeous. Anyway, I decided to save the glitter hassle of ES for when it is closer to Christmas, and opted for the easier Evergreen Dream this time.

FP Evergreen Dream w/ Orly Prisma Gloss Gold


And here is my Christmas Tree mani! I used Orly's Prisma Gloss Gold over Evergreen Dream, and HOLY GOOSES I love it! It has the perfect amount of "colorful lights" glitter!

Are you excited for the holidays? Have you been doing holiday manis? What do you think of the Christmas Tree mani?

Monday, November 22, 2010

OPI Glitzerland and Bring on the Bling

I have been all about trying accent nails lately since this post on Polish or Perish, and this combination is my FAVORITE. I love that the overall tone of both of these is a nice neutral gold that tends to look spectacular on any skin tone. This is OPI Glitzerland with a Bring on the Bling accent nail.

One of the best parts about OPI glitter, in my opinion, is that instead using of holo glitter for extra color, they actually use different colors and sizes of glitter. Instead of becoming quite dull in the shade and indoors like holo glitter can, it maintains its super colorful "party confetti" appearance no matter the light.

This picture was taken on day 3 of the manicure - no chips and very little tipwear (which was probably actually caused by Seche Vite shrinkage anyway).


This was taken in the sun on the 4th day, and it still looks perfect. Glitzerland just glistens (no pun intended, it's true!) in the sun! It's nearly as sparkly as Bring on the Bling!

I have more accent nail manicures to show you coming soon!

Do you like the accent nail thing? Texting thumbs or other fingers?

Thursday, November 18, 2010

Zoya Kelly Swatches and Review

A couple days ago, Zoya tweeted that 91% of people who placed an order with Zoya purchased Kelly. I was part of that 91%. When I ordered it, I didn't realize it was on backorder, but it arrived shortly after the rest of my order anyway, and it was definitely worth it. This color is so chic, and feels very autumn/winter to me.


Zoya Kelly

Zoya Kelly is a marvelous dark grey that never ever looks black. It has a blue-ish undertone to it, but it still maintains that neutral grey "goes-with-anything" vibe. Sometimes I have a little trouble with Zoya formula (when paired with their small brushes), but this one was very nice. It's not too thin, doesn't dry while I'm applying it, and comes to a beautiful glossy finish. This is two coats shown.

And because I've been wanting to try some "accent finger" manicures, I figured I tried it with this one (since I have the thumb unpainted while swatching). This would be one of those "texting" manicures where the thumb (used to text) is much more flashy while the rest are a nice classy creme or shimmer. It's a bit ridiculous, but I kinda like it. I decided to pair Kelly with Zoya Edyta because it has the same grey base while also having smokey green sparkle.

Zoya Kelly w/ Zoya Edyta Accent


What do you think? Are you in love with Kelly? Do you like the "texting" manicure, or is it too off-the-wall?

Wednesday, November 17, 2010

CG White-Kwik-Silver and Orly Lunar Eclipse

Recently I got a couple things from Piff's sale on Polish or Perish, and figured I'd swatch and review them, since I really liked both.


China Glaze White-Kwik-Silvr

The first up is China Glaze White-Kwik-Silvr, and I have to say it's gorgeous. I hesitated to get this one since I just recently bought Frosty (from the 2010 winter collection), but I'm glad I got it. It is, however, NOT big 3 free, and it shows in the awesome formula. It's nice and thin and very easy to apply, and even though it doesn't get completely opaque in three coats, it still looks so clean and nice.

Since I had Frosty to compare it with, I decided to do some side-by-side swatches.

2 coats Frosty, 3 coats White-Kwik-Silvr

This is two coats of Frosty on my index and middle finger, and three coats of White-Kwik-Silvr on my ring and pinkie. They look very similar at this point, but the difference came out when I added one more coat.

3 coats Frosty, 4 coats White-Kwik-Silvr

This picture shows the opacity differences. Frosty is completely opaque at three coats, while White-Kwik-Silver still has VNL at four coats. Also, you can see in this picture that Frosty has a more white/silver shimmer to it, while White-Kwik-Silvr has a light gold shimmer, though both have a clean white base color. Frosty was a bit more thick, but still nice. If you couldn't find White-Kwik-Silvr, Frosty is probably worth picking up! Both are awesome!


Orly Lunar Eclipse

The second polish I got was Orly Lunar Eclipse from the Cosmic FX collection. It's such a bright electric blue, and it has awesome royal blue/purple flashes at certain angles. You can kind of see it in the next photo:


I'm so happy I got these when I had the chance! Thanks, Piff!

Tuesday, November 16, 2010

Rescue Beauty Lounge Swatches and Review

I tried now to go TOO crazy during the 50% of sale at Rescue Beauty Lounge a couple weeks ago. I got five new polishes and I figured I'd swatch them all and put up my review (even though there are plenty out there already).

Rescue Beauty Lounge Plie

The first one I tried was Plie. Like All Lacquered Up, I was drawn to Plie even though pinks are so not my thing (especially light girly ones). But after I put it on my four swatch fingers, I just had to put it on the rest (thus delaying the rest of the swatches). I absolutely love this color. It's a bit warm-toned and dusty, and it looked great on my skin tone. It's seems thin, but it's pretty opaque and easy to work with. This is two coats.


Rescue Beauty Lounge Au Chocolat

The second one is Au Chocolat. It's a reddish-brown creme/jelly. It has nice buildup to opacity in just two coats, but somehow manages to have that glossy jelly look. It's very nice, and doesn't look black even in low light.


Rescue Beauty Lounge Orbis Non Sufficit

This is such an awesome green, and I'm so glad I got it because I have nothing like it in my collection! The dusty quality really sets it apart. It's also almost perfect in one coat, but I like the slightly thicker look of two coats.


Rescue Beauty Lounge No More War

This one is so cool, but you really have to like that olivey brownish-green murky type of color. I do have something similar (NOT a dupe) in my collection: Obsessive Compulsive Cosmetics Swamp Thing. I decided to do a quick comparison for you here. You can see that Swamp Thing is a couple shades darker and sometimes looks more green, sometimes more brown. No More War definitely has a tad more yellow.


I also got Medium White, but it doesn't look right by itself in my opinion (even after three coats), but I may do an America/French manicure with it to show it off in the near future.

Overall, I'm very pleased with all of the polishes I got from this sale. They are all of excellent quality and I will certainly be wearing each one more than once! The sale is no longer going on, but you can still purchase RBL polishes here.

Saturday, November 6, 2010

Incoco Head Over Heels Swatches and Review

Today I have a review for you of the one of the new Incoco colors from their fall release. If you haven't seen or heard of Incoco before, they are basically nail polish "stickers" (I use this loosely, because they are actually 100% nail polish) which are applied half dry and are self-adhering. I have tried a few Incoco manicures before with much success, so I decided to write a full review of the product.

Let's start with some nail prep. Here are some of the things I use to prepare my nails before applying the Incoco strips.


First, I remove all old nail polish with acetone nail polish remover (the non-acetone nail polish remover is for when I have nails that have an acrylic repair on them). Then, I file the length done and shape the edges. Finally, I buff the ridges on all the nails that need it. I know some don't like to buff the nails because it can weaken them, but if you don't buff lightly, the Incoco tends to show the ridges - the cremes especially. Another possibility is to use a ridge-filling basecoat, but I prefer to use NO basecoat under Incoco because it makes application a bit more difficult. After filing and buffing, I make sure to wash my hands thouroughly to get all the dust off and make sure they are clean and dry.

Here is a picture of the goodies they sent me to review! Exciting, yes?


I decided to do Head Over Heels today, but I will post a review of Just My Luck as well in the near future.


As you can see, it is a cool-toned magenta with some red and blue sparkles - pretty awesome! When I peeled off the backing to the strips, they look like more of a jelly than a creme because they are see through! However, no visible nail line to be seen at all! Check it out!

Head Over Heels (shade)

In the shade, it's just a little shimmery, but still a very pretty color. In the sun the sparkles in it are a lot more apparent, but it's not super bling-y like a glitter or a glass-fleck shimmer. I really like it, and I'm not much of a pink person!


Head Over Heels (sun)


After the prep, I just followed the instructions provided by Incoco, but I have a few tips as well:

1. Don't use a basecoat. The Incoco will stick like glue to a basecoat immediately, allowing for no correction after it has been placed. Without a basecoat, if you make a mistake, it's very easy to just peel it off and reapply it.

2. Don't be afraid to handle them lightly with your fingers. If your hands are clean, there should be no dust or anything to stick to the strips (which aren't extremely sticky). I prefer to flatten the strips out before I position and place them, and stretch them to fit the nail edges.

3. When choosing a size, I think that the best way is to choose slightly smaller rather than bigger. It is quite easy to stretch the strips to fit the nail, but I have more trouble when I try to file off excess that hangs over the nail onto the cuticle.

4. I like to gently push back the cuticles right before applying the strip in order to get it as close as possible to the cuticle so that is lasts longer without getting a gap - especially if I'm planning on wearing them for a week or longer.

5. Practice makes perfect. This is a difficult one to accept sometimes, but in my case it was true. Each timeI found another little tip/trick that worked for me and I got much better at it each time. Also, some colors are easier than others. The glitters, for instance, are the easiest to apply perfectly in my opinion, while the cremes are the most difficult to get nice and smooth because they seem a bit thinner.

Overall, I love Incoco and their awesome product! I have tried the french tips (which make for PERFECT smile lines), the black creme (Midnight), and a couple of the glitters (24 Karat and Penny Rose). 24 Karat is my absolute favorite and as soon as I tried it on, I knew I had to order more of that one! It lasted 11 (ELEVEN!!) days with NO chipping and NO tipwear! Even then, I wasn't sick of the color, it had just gotten quite a gap and I was anxious to try some other Incoco colors! I just wish they weren't quite as expensive as they are

I will try the nail polish removers when I take these off and comment on the wear at that time as well

So what do you think? Have you tried Incoco? Do you like the idea of stick-on nail polish?

Friday, November 5, 2010

Camo nails!!


Edit: I redid my editing on the picture and I think this captures the colors much more accurately than the picture below.

So here is a cool camo manicure I did a couple days ago. Unfortunately it looked way too blue in the pictures and I tried to fix it a little, but it looks a little washed out now.


I used Essie Sew Psyched, Obsessive Comelsive Cosmetics Swamp Thing, and Barielle Chashmere or Lose Me, because these looked as close to the Chanel Khaki collection as I could get without paying $75. I got the idea from All Lacquered Up's post here. In person, it looks much closer to the browns and green you see in her post, but for some reason my camera didn't like the colors...

Anyway, Emerald Sparkled is having an awesome giveaway with great prizes! You should check it out and enter here!

Wednesday, November 3, 2010

Halloween nails and Zoya Cheryl

Way back when I got the China Glaze Halloween collection, I tried them all on like this (one on each finger), but since it was only September, it was too early to wear my Halloween nails. So I was really looking forward redoing this but with ALL my fingers! For some reason, I really love how this collection looks together, as a "skittles"-style manicure.

China Glaze Awakening Collection

Anyway, after Halloween, I was really wanting a nice brown fall color, and I couldn't wait to try Zoya Cheryl from my latest Zoya order. It's a gorgeous brown color with copper glass fleck shimmer. I was a little disappointed though because I was expecting it to have much more sparkle to it.

Zoya Cheryl

I did use Zoya's Anchor and Armor for base and top coat since I hear that Zoya polishes do not last as long with others, but Armor didn't give me the awesome shiny look that Seche Vite does, so I ended up putting that on top of the Armor. But then, of course, it caused some shrinkage (you can see it at the tips in the picture).

What do you think of Halloween nails? What are your favorite designs and colors? Do you like Zoya Cheryl?

Friday, October 22, 2010

NOTD - Revlon Galaxy

This is a NOTD I had a couple weeks ago. After a couple days with Misbehaving Mistress I decided to spice it up a bit. I had recently bought Revlon Galaxy on a whim when I saw it in Walgreens and thought it looked pretty amazing. Turns out, it IS pretty freaking sweet. Check it out!


Revlon Galaxy over Barielle Misbehaving Mistress

Isn't it so neat looking! It has (from what I can tell) black, blue, and iridescent small glitter, with large holo hexagon silver glitter. This was taken in artificial light and doesn't show the holo-ness, but trust me, it's there! I'm definitely going to try this one over lots of other colors.

I also have the red glitter Revlon Slipper from the same collection that I got solely because of Scrangie's post here. Seriously, how awesome is THAT?!

What do you think? Did you like this or any of the other glitters in the recent Revlon collection?

Thursday, October 14, 2010

Del Sol Trick-or-Treat Swatches and Review

I got an email from Del Sol recently announcing their new Halloween nail polish named Trick-or-Treat and I knew I had to have it. I emailed back asking if Walgreens would stock them. Unfortunately not all Walgreens ordered them (none in AZ did), but luckily I have a Del Sol store that's pretty close to where I live so I picked it up!

It's really neat-looking in the bottle because it's a crazy copper/orange fine glitter mixed with a bunch of fine silver holo glitter. Outside, the bottle looks like the base turns black while you can still see both colors of glitter. On the nail it turns out to be a bit less spectacular, but still pretty awesome. I tried the first nail (my index) with Trick-or-Treat on its own, and it's a little "dirty" looking, so I decided to try layering it over other colors (2 coats layered on each color, 3 coats on its own). Shown below are Trick-or Treat over (thumb to pinkie) China Glaze Marmalade, by itself, Essence Get the Fever, Barielle Make it a Latte, and Wet'n'Wild Black Creme.


Del Sol Trick-or-Treat (shade)


Del Sol Trick-or-Treat (sun)

Overall, I think I like it over brown the best because it complements the copper color of the glitter, and it looks like a deep rich black in the sun, although the oranges look pretty awesome too! Over the orange, it turned more of a deep, dark plum purple instead of black.

As far as I know, it may be hard to find this one in Walgreens, but most Del Sol storefronts should have it available. If you don't live near a Del Sol store, you can order it online at http://www.delsol.com/, but I'm not sure about their international shipping policy.

So what do you think? Do you like the cool color changes of Del Sol Trick-or-Treat?

LinkWithin

Related Posts Plugin for WordPress, Blogger...